Implement Apache Solr in Django for rich Web search options. Undoubtedly, bad search utilities disturb the visitor traffic for websites. Therefore, never take your search utilities lightly while building your website or application. Seemingly, the search is a game played by three at a time. Inclusively, it involves the visitor’s search behavior, your web content potential, and the search engine algorithms. Accordingly, customize your search features by building the Solr on top of the Apache ecosystem and leverage the power of success.
Thus, we can integrate Apache Solr implementation with django using Haystack. To begin with, we need to be performing the following in django:
- Create search indexes for models in Django
- Build schema using Django and move it to Solr
- Configure Apache Solr
Solr Implementation using Django-Haystack Setup:
Requirements:
- 1.8 <= Django >= 1.6
- Django-haystack
- Pysolr
using pip install requirements.
Add following to your setting.py
HAYSTACK_CONNECTIONS = {
‘default’: {
‘ENGINE’: ‘haystack.backends.solr_backend.SolrEngine’,
‘URL’: ‘https://127.0.0.1:8983/solr’
},
}
Add searchView to project urls.py
(r’^search/’, include(‘haystack.urls’)),
Hence, Django Initial setup is finished. Subsequently, we need to create search indexes for our data’s in database. Interestingly, we need not to create search index for all items in database. Noticeably, we only need to create search index for corresponding models only.
Creating Search Indexes
Search Index objects are the way Haystack determines what data should be placed in the search index and handles the flow of data in. Furthermore, you can think of them as being similar to Django Models or Forms in that they are field-based and manipulate/store data.
Create Search Indexes with search_indexes.py
if having models like this
models.py
class Mobile(models.Model):
name = models.CharField(max_length=100)
manufacture = models.CharField(max_length=100)
description = models.CharField(max_length=1000)
Therefore, search_indexes.py for above model is
from haystack import indexes
from .models import Mobile
As a logical next step, let us look into:
class MobileIndex(indexes.SearchIndex, indexes.Indexable):
text = indexes.CharField(document=True, use_template=True)
name = indexes.CharField(model_attr=’name’)
manufacture =indexes.CharField(model_attr=’manufacture’)
description = indexes.CharField(model_attr=’description’)
name_auto = indexes.EdgeNgramField(model_attr=’name’)
manufacture_auto = indexes.EdgeNgramField(model_attr=’manufacture’)
description_auto = indexes.EdgeNgramField(model_attr=’description’)
suggestions = indexes.FacetCharField()
def get_model(self):
return Mobile
def index_queryset(self, using=None):
“””Used when the entire index for model is updated.”””
return self.get_model().objects.all()
def prepare(self, obj):
prepared_data = super(MobileIndex, self).prepare(obj)
prepared_data[‘suggestions’] = prepared_data[‘text’]
return prepared_data
Additionally, we’re providing use_template=True on the text field. Thus, this allows us to use a data template (rather than error-prone concatenation) to build the document the search engine will index. Supposedly, you’ll need to create a new template inside your template directory called search/indexes/myapp/note_text.txt and place the following inside:
{{ object.name }}
{{ object.manufacture }}
{{ object.description }}
As a result, search indexes are created successfully. Followed by that, we need to set up Apache Solr Search Engine.
Read also: How beneficial is Django for existing Python developers?
Apache Solr Setup:
Requirements:
- Solr 4.10.2 ( Haystack suggests using Solr 3.5+)
- Java
Download Solr from https://lucene.apache.org/solr/downloads.html
Only in solr need to modify following files for django integration.
- schema.xml
- solrconfig.xml
Create Schema For your Project:
You’ll need to revise your schema in solr with respect to your django project. Simply, just run
python manage.py build_solr_schema
Take the output from that command and place it in solr4.10.2/example/solr/collection1/conf/schema.xml
solrconfig file setup:
In solrconfig file we can add following functionality also
More Like This
To enable the “More Like This” functionality in Haystack, you’ll need to enable theMoreLikeThisHandler. Add the following line to your solrconfig.xml file within the config tag:
<requestHandler name=”/mlt” class=”solr.MoreLikeThisHandler” />
Spelling Suggestions
Add the following line to your solrconfig.xml file within the config tag:
<searchComponent name=”spellcheck” class=”solr.SpellCheckComponent”>
<str name=”queryAnalyzerFieldType”>textSpell</str>
<lst name=”spellchecker”>
<str name=”name”>default</str>
<str name=”field”>suggestions</str>
<str name=”spellcheckIndexDir”>./spellchecker1</str>
<str name=”buildOnCommit”>true</str>
</lst>
</searchComponent>
Then change your default handler from:
<requestHandler name=”standard” class=”solr.StandardRequestHandler” default=”true” />
… to …:
<requestHandler name=”standard” class=”solr.StandardRequestHandler” default=”true”>
<arr name=”last-components”>
<str>spellcheck</str>
</arr>
</requestHandler>
After setting up run server as following
cd solr-4.10.2
cd example
java -jar start.jar
go to the following link in browsher,
https://127.0.0.1:8080/solr/#/
The default port for Solr is 8983. In Screenshot, we running in 8080 port.
After Run solr server, using following comments to update server indexes:
Steps:
1: python manage.py build_solr_schema –> create schema for solr schema.xml
2: python manage.py update_index — > update new indexes to solr server
3: python manage.py rebuild_index — > remove old indexes update all as new
haystack QuerySest:
from haystack.query import SearchQuerySet
Haystack queryset help us to get data from Solr search engine.
search_keyword = request.POST[‘q’]
data = SearchQuerySet().auto_query(search_keyword)
returns all similar to search keywork
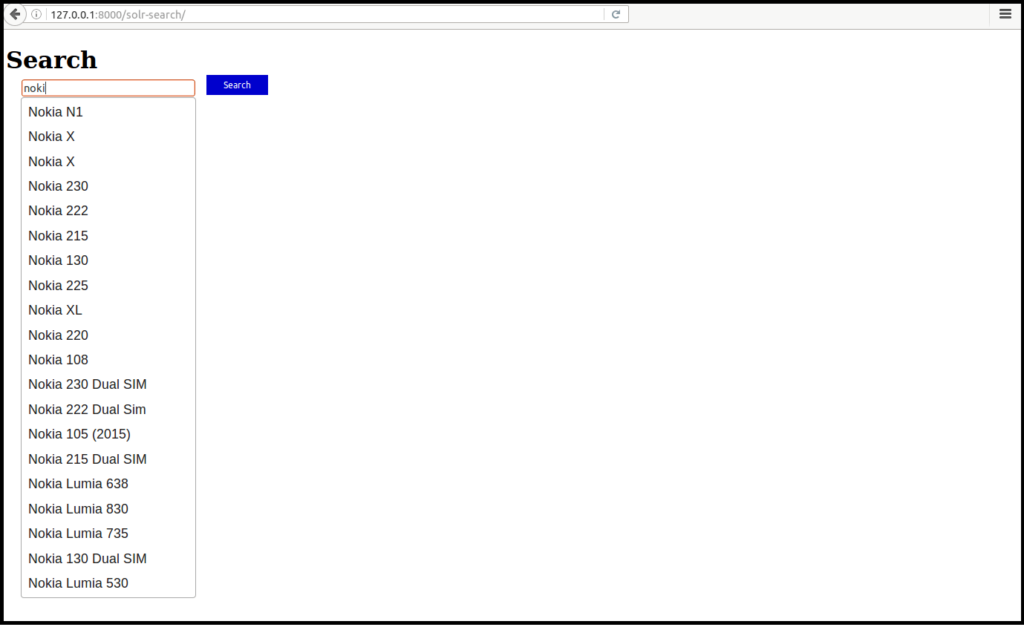
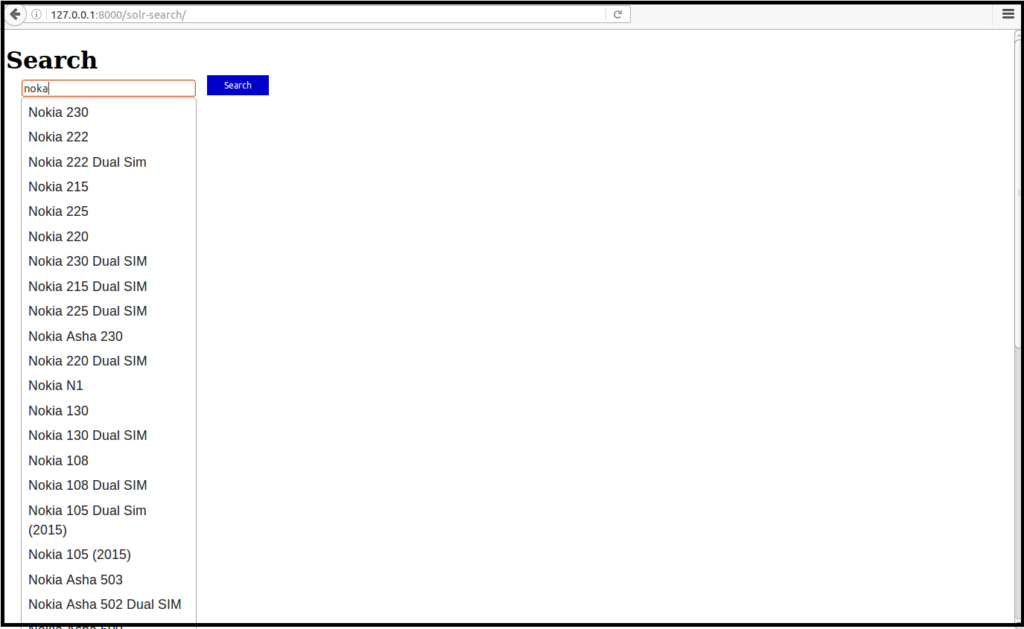
spelling = data.spelling_suggestion()
returns correct spelling for incorrect spelling, below example i just typed noka for nokia but it return value for nokia.
Similarly following haystack queryset help as make search in better.
hello_results = SearchQuerySet().filter(content=’hello’)
hello_world_results = SearchQuerySet().filter(content=’hello world’)
unfriendly_results = SearchQuerySet().exclude(content=’hello’).filter(content=’world’)
recent_results = SearchQuerySet().order_by(‘-pub_date’)[:5]
sqs = SearchQuerySet().filter(content=’foo’).highlight()
result = sqs[0]
result.highlighted[‘text’][0]
Deployment of Solr inTocamt:
Requirements:
Tomcat >= 6
We can setup solr in tomcat using 2 methods
Follow the steps:
- sudo apt-get install tomcat7 tomcat7-admin
- mv solr-4.10.2 /usr/share/solr
- sudo cp /usr/share/solr/example/webapps/solr.war /usr/share/solr/example/multicore/solr.war
- secondly, sudo cp -r solr/example/lib/ext/* /usr/share/tomcat7/lib
- finally, sudo cp -r solr/example/resources/log4j.properties /usr/share/tomcat7/lib
- Edit /usr/share/tomcat7/lib/log4j.properties and also set your log path by setting
solr.log=/usr/share/solr - Now add solr to the Catalina config
cd /etc/tomcat7/Catalina/localhost
sudo gedit solr.xmladd the following to solr.xml<Context docBase=”/usr/share/solr/example/multicore/solr.war” debug=”0″ crossContext=”true”>
<Environment name=”solr/home” type=”java.lang.String” value=”/usr/share/solr/example/multicore” override=”true” /> </Context>
Setup Tomcat Manager
sudo gedit /etc/tomcat7/tomcat-users.xml
add the tomcat user within the users block:
<tomcat-users>
<role rolename=”manager-gui”/>
<user username=”giluxe” password=”giluxe” roles=”manager-gui”/>
</tomcat-users>
sudo chown -R tomcat7 /usr/share/solr/example/multicore
sudo service tomcat7 restart
Step 2:
Install Tomcat and subsequently, open your tomcat manager webapp and also add your war file to war file to deploy.
War file is in /solr-4.10.2/example/webapps/solr.war
Read also: How does the Django framework in Python overcome the frameworks in PHP?


